Article
How to set up first party data for your survey
First party data let you use your own customer data to target and personalize surveys. Instead of relying on third-party targeting, you upload a list of known users — and we take care of the rest.
Step 1: Prepare Your Audience File
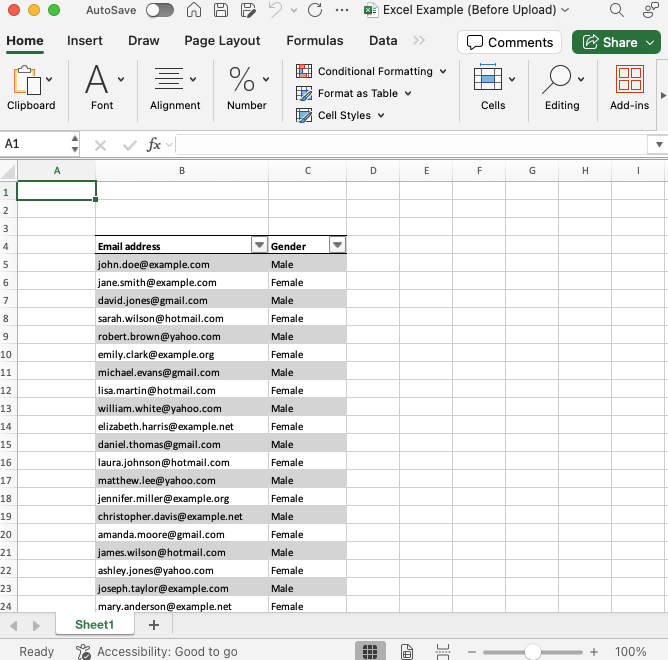
Start by creating an Excel spreadsheet that contains a table. This is important — it must be formatted as an Excel table (Insert → Table).
Your table should include:
- One required column: a user identifier. This can be a customer ID, hashed email, or anything unique per respondent. Avoid PII if you can — we scrub this field anyway, just in case.
- Optional columns: any other data you want to use to pre-fill survey answers (e.g. Age, Region, Customer Type, Annual Spend). These should match question codes in your survey — more on that below.
We currently support up to ~20,000 rows per audience. You can upload multiple audiences, but total size depends on the length of your IDs and the number of fields.
Step 2: Upload Your Audience
Once your file is ready:
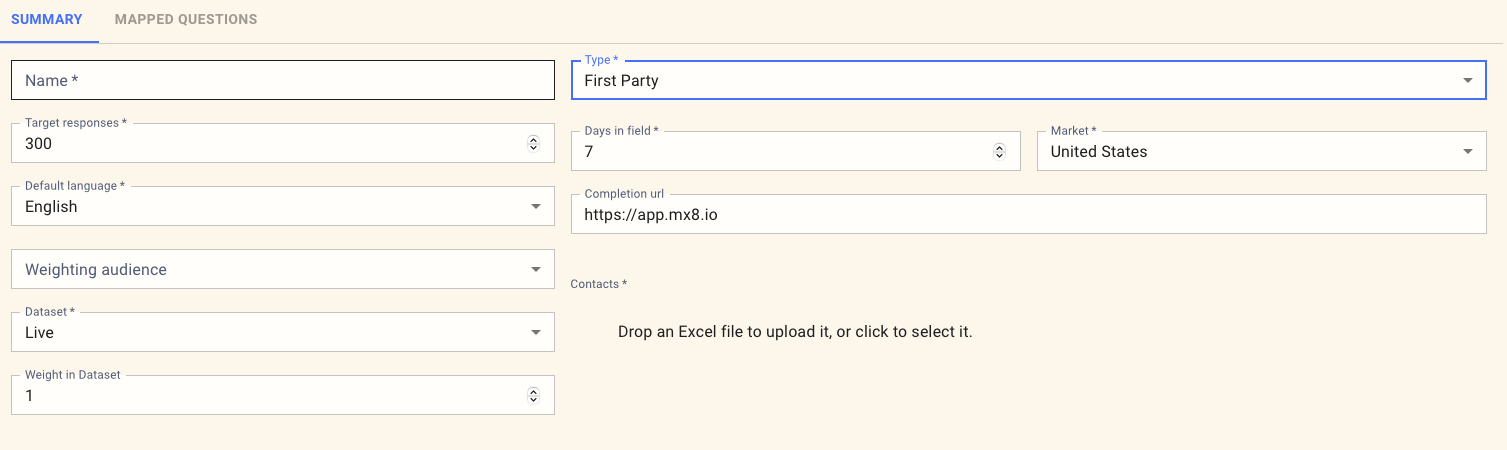
- Go to the Summary tab of your survey.
- Click **Create Respondent Source, ** select First Party Data and select your Excel file.
- The system will validate your table, scrub any sensitive info, and make the data available to your survey.
Step 3: Match to Survey Questions
To use first-party data in your survey:
- Ensure that your question codes align with the column headers in your table.
- For example, if your table has a column labeled 'Age,' include a question in your survey that asks the audience to state their age.
- When the survey runs, this data is used to pre-fill answers, so the respondent doesn’t have to answer that question again.
You can also include metadata that doesn’t appear in the survey (e.g., Segment, Spend Band). If there’s a matching question code in the survey, it’ll be available in the reporting.
Step 4: Distribute Your Survey
Once everything’s set up:
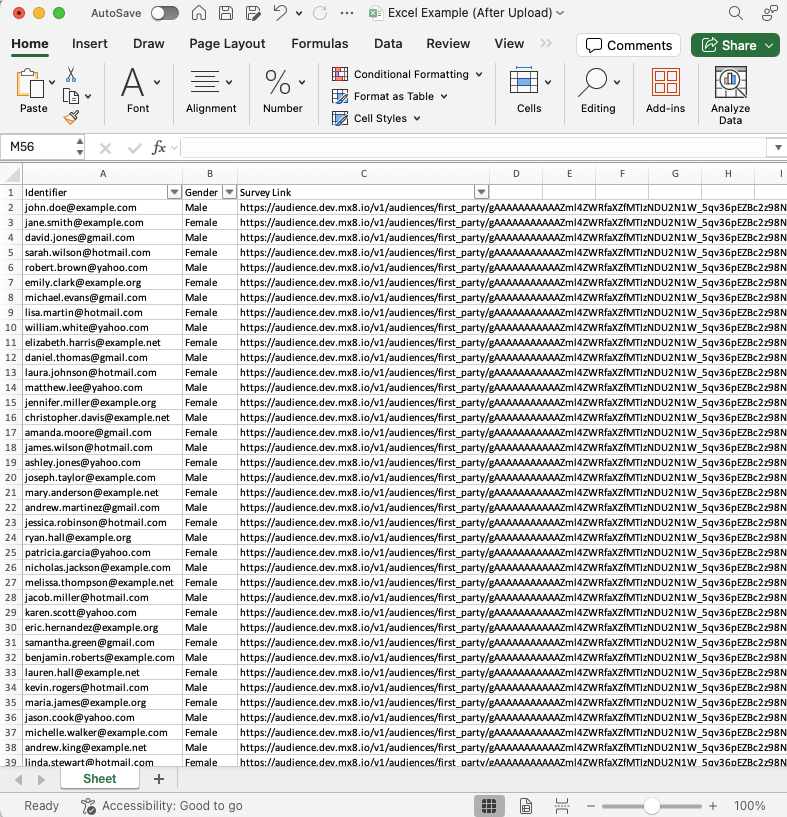
- Launch your survey as normal.
- You’ll be able to download a spreadsheet of unique survey links, one per respondent.
- Send these out however you like — email, SMS, in-app, whatever fits your workflow.
Configuring what happens after Survey Completion
Usually, you'd enter a URL in the completion_url that you want the respondent redirected to after completing the survey. The URL will have appended a status element in the query string as follows:
- ?status=complete
- ?status=terminated
- ?status=refused_consent
- ?status=quota_screenout
- ?status=quota_overquota
- ?status=poor_quality
- ?status=duplicate_respondent
If you don't want to redirect at the end of the survey, leave the completion_url field blank.
Bonus: Enhanced Reporting with First Party Fields
Adding fields such as actual spend, segmentation, or tenure allows you to go beyond survey responses in your analysis. As long as the data maps to a question code, you can filter, cross-tab, and chart it in MX8 Labs' reporting tools.
For example:
| First Party Field | Question Text | Used for |
|---|---|---|
| AnnualSpend | What was your total spend with us last year? | Survey logic and reporting |
| Segment | Which customer segment are you in? | Filtering & analysis |
| Tenure | How long have you been a customer? | Cross-tab & reporting |
| Region | Which region are you based in? | Pre-fill & segmentation |
| CustomerType | Are you a business or personal customer? | Pre-fill & analysis |
Need help formatting your spreadsheet or mapping questions? Get in touch through the box on the bottom left — we’re happy to walk you through it.